
How to Build a Classic Gable Roof for a Log Cabin: A Detailed Step-by-Step Guide
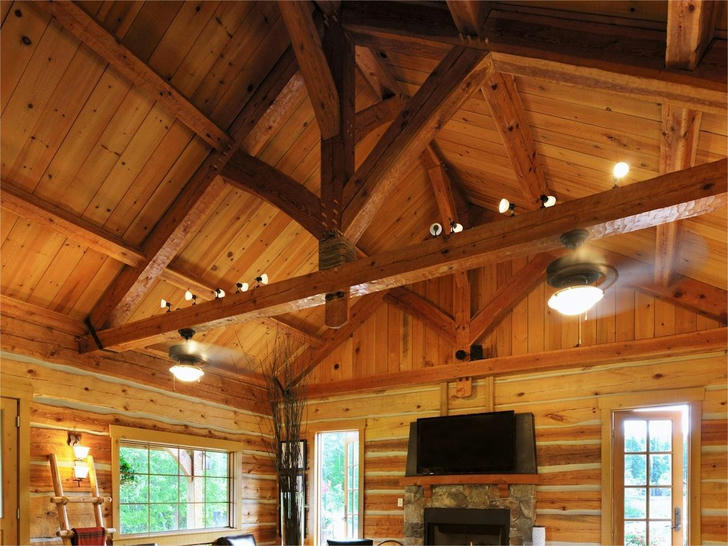
In log cabin construction, the roof is a crucial component. It not only supports the weight of the roofing materials but also needs to withstand external elements such as rain, snow, and wind. A gable roof, with its simple and functional design, is often the preferred choice for many log cabins due to its effective drainage and structural benefits. In this article, we will provide a detailed, step-by-step guide on how to build a classic gable roof, ensuring that the structure is sturdy, durable, and able to withstand various weather conditions.
Step 1: Preparation
Before beginning the roof construction, it's important to take the time for proper preparation. Planning and gathering the necessary materials and tools will ensure that the process goes smoothly and set the foundation for the steps ahead.
1.1 Design the Roof Framework
Start by determining the specifications and structure of the roof based on the overall design of the log cabin. A gable roof consists of two sloped planes that meet at the ridge. When designing, consider factors such as the roof pitch, the strength of the materials, and the drainage system. The pitch of the roof should be chosen based on local climate conditions. If you live in an area with heavy snowfall, a steeper pitch is ideal to help the snow slide off more easily.
1.2 Measuring and Marking
Before you begin building, measure the width, length, and angle of the top of your log cabin. Accurate measurements are essential to ensure that the ridge line of the roof is positioned correctly. Using a level, mark a reference line around the entire cabin to guide the placement of the roof frame. This line serves as the baseline for the ridge beam.
1.3 Material Selection
Choosing the right timber for the roof structure is crucial. Common materials for gable roofs include pine, spruce, and fir, as these woods provide good strength and resistance to weathering. Select high-quality timber that can bear the weight of the roof and withstand exposure to the elements.
1.4 Tool Preparation
You will need various tools for building the roof, including a saw, hammer, bolts, nails, level, measuring tape, chalk line, ladder, and others. Make sure that all tools are in good condition and ready for use to streamline the process and enhance efficiency.
Step 2: Building the Roof Framework
Once the preparation is complete, the next step is constructing the roof framework. This is the backbone of your roof, supporting the weight of the roofing materials and ensuring stability.
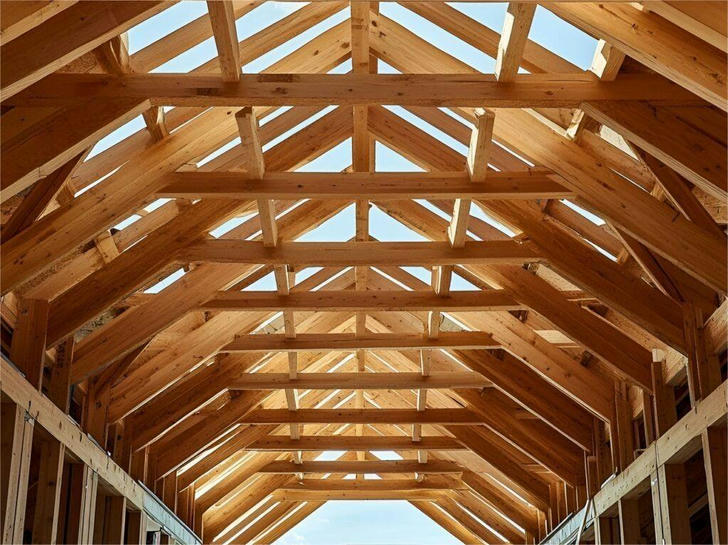
2.1 Install the Ridge Beam
The ridge beam is the primary support for the roof structure, as all the rafters will connect to it. First, place the ridge beam on top of the cabin walls, ensuring that both ends are securely anchored. The length of the ridge beam should correspond to the width of your cabin, but it should extend a little beyond to support the rafters.
Use a level to ensure that the ridge beam is perfectly horizontal. It is critical that the beam sits level to avoid any uneven roof slopes. To secure the ridge beam, use metal brackets or wooden brackets at each end and fasten them with bolts or nails.
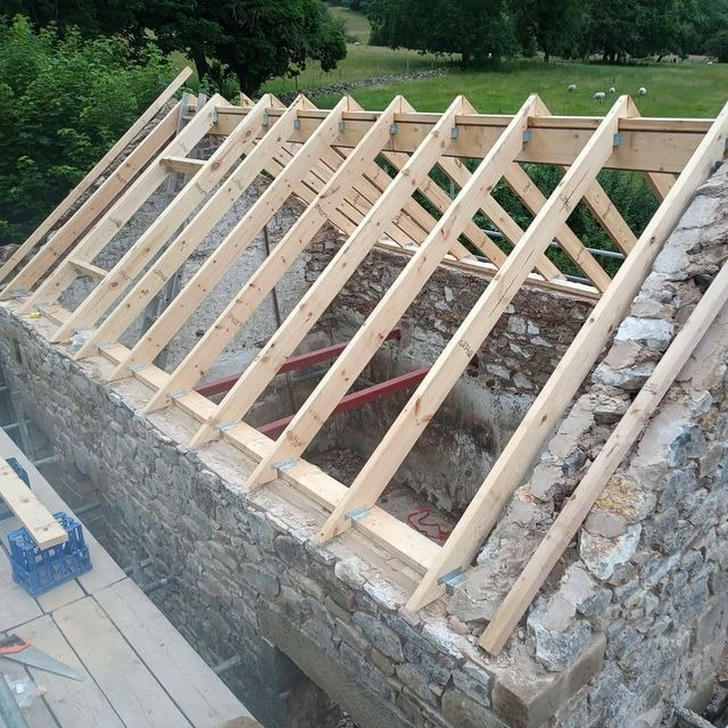
2.2 Install the Purlins and Rafters
Next, install the purlins—horizontal beams that run parallel to the ridge beam and provide support for the rafters. The purlins should be spaced evenly, typically 16 to 24 inches apart, depending on the roof's load-bearing requirements.
Once the purlins are in place, install the rafters. The rafters will sit at an angle from the ridge beam to the top of the cabin walls. To ensure structural integrity, the rafters must be securely fastened at both ends. The angle of the rafters will depend on the roof pitch chosen earlier. Use a carpenter's square to ensure the angle is correct.
As you install the rafters, use a level and a vertical plumb bob to ensure that each rafter is perfectly aligned. This ensures the roof slope is consistent and the structure is square.
2.3 Reinforce the Ridge and Rafter Connection
To strengthen the connection between the ridge beam and the rafters, install metal brackets or wooden blocks at the joints. This added reinforcement helps distribute the weight of the roof evenly, especially in areas prone to high winds. Secure each joint with bolts or screws to ensure a stable connection.
This step is particularly important in windy regions where additional support is necessary to keep the roof frame from swaying.
2.4 Check Structural Stability
After the purlins and rafters are installed, it’s important to check the overall stability of the roof framework. Test the framework by gently rocking the ridge beam and rafters to see if there is any movement. If any part of the structure feels loose or wobbly, reinforce the joints and connections.
At this stage, you should be confident that the framework is secure, as any movement in the structure can lead to roof instability over time.
Step 3: Install the Waterproof Membrane
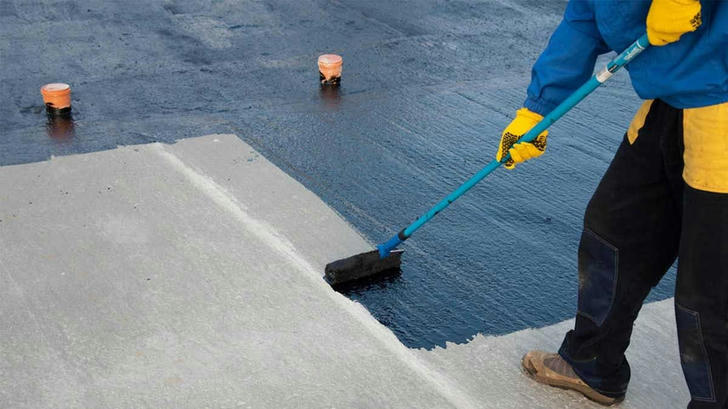
To prevent leaks and ensure the longevity of your roof, a waterproof membrane must be installed. This layer acts as a barrier to moisture and protects the wood structure from decay.
3.1 Choose the Right Waterproof Membrane
Select a high-quality waterproof membrane, such as polyethylene or EPDM rubber, to protect the roof. If you live in a sunny area, you should also choose a membrane with UV protection to prevent deterioration from prolonged exposure to the sun.
3.2 Install the Membrane
Starting from the ridge, unroll the waterproof membrane across the rafters. Ensure that each row of the membrane overlaps the one below it by at least 20-30 cm. This overlap will help prevent water from seeping through the seams.
Use large-headed nails or staples to secure the membrane in place along the rafters. Make sure that the membrane is taut, and there are no air pockets that could allow water to pool.
Once the membrane is laid down, use sealant or tape to seal any gaps at the ridge and eaves. This provides an additional layer of protection against water ingress.
Step 4: Install the Roofing Materials

With the waterproof membrane in place, it’s time to install the roofing materials. The choice of roofing material depends on your preferences and budget. Common options include metal roofing panels, shingles, or wooden shakes.
4.1 Prepare the Roofing Panels
Measure the roof area and cut the roofing materials to fit. If you are using metal roofing panels, ensure they are cut to the appropriate size. For shingles or wooden shakes, make sure they are pre-cut according to the roof's dimensions.
4.2 Install the Roofing Panels
Start from the bottom of the roof and work your way up toward the ridge. Each row of roofing panels should overlap the one beneath it to create a weather-tight seal. If you are using metal panels, secure them with screws or nails at the recommended intervals. For shingles or shakes, use roofing nails to fasten them securely to the rafters.
Be sure to use a level to ensure each row of roofing material is straight and even. It is important to maintain consistent spacing between each panel or shingle to allow for proper expansion and contraction.
4.3 Install Ridge and Eave Caps
To complete the roof, install ridge and eave caps. These caps help seal the joints where the roof panels meet at the peak and edges, preventing water from entering through the gaps. Use nails or screws to secure the caps in place, ensuring they are tightly fitted.
Step 5: Install the Drainage System
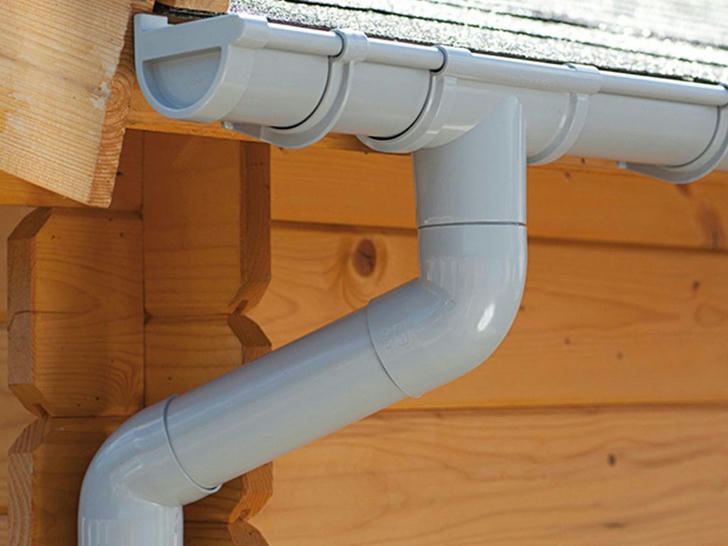
Finally, to prevent water from pooling on the roof and causing damage, install a drainage system. This includes gutters and downspouts, which direct water away from the roof and the foundation of the cabin.
5.1 Install Gutters
Attach gutters along the eaves of the roof. Ensure that the gutters are sloped slightly towards the downspouts to allow water to flow efficiently. Gutters should be securely fastened to the roof structure with brackets.
5.2 Install Downspouts
Connect the downspouts to the gutters and direct them towards the ground, away from the cabin’s foundation. Ensure the downspouts are positioned to avoid water pooling around the cabin's base, which could lead to erosion or damage to the foundation.
Conclusion
By following these steps, you can successfully build a classic gable roof for your log cabin. From constructing the roof framework to installing the waterproof membrane, roofing materials, and drainage system, each step plays a crucial role in ensuring the roof's stability, durability, and protection from the elements. By paying attention to detail and using the right materials, you’ll have a sturdy roof that will stand the test of time and provide lasting protection for your log cabin.